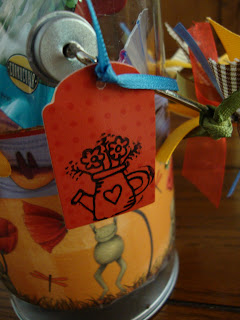
Apart from my throwing flowers into a few pots, the only gardening that I do is in the form of art! I have created an altered artworks garden pail --I know it pales in comparison (ooh, sorry!) to my neighbor's garden, but as they say, it's the thought that counts! And that's exactly what this is: a thoughtful and personal handmade gift for a friend, Mom, aunt, teacher, or even your next door neighbor! This is the finished project:
Here's how you make it:
Start with a clear acrylic pail bought at your local crafts store.
Start with a clear acrylic pail bought at your local crafts store.
Choose colorful, fun scrapbook paper
I used a garden motif. Cut a 3-1/4" x 12" strip of paper, and mod-podge it (hey, Amy -- is "mod-podge" an actual verb?), wrapping the paper around the circumference of the pail, leaving a 1" space at the bottom.
The pail is about 1/2" smaller in diameter than the 12" paper, so I just added a 3-1/4" length of 1/2" ribbon to cover the gap. You can also just add an extra inch of the scrapbook paper, and believe me, no one will be the wiser. Cut a 3" circle and mod-podge this to the lid. After a few minutes, apply additional Mod Podge over the paper.
I added a punched tag (using EK Success' new Journal Plate punch) , a cute bug charm, and spelled out "Mom" with my label maker.
I continued adding colorful, coordinating ribbons to the handle, a chipboard bird, flowers, a brad, and finally a chipboard tag (stamped with a picture of a watering can with flowers).
Then add a brightly-colored shovel, a few packets of flower and vegetable seeds, several plant food stakes, and you have a personal gardening gift!
Of course, you can add anything to the pail such as gardening gloves, a coupon "good for one day of helping plant the seeds" (great for kids to give to their Mom or Grandma) and maybe even some herbal mint tea bags.


Just fabulous! And definately my kind of 'gardening' :)
ReplyDeleteWhat a great idea. Gonna have to share this with my friends on Facebook.
ReplyDeleteSo cute! I LOVE how you embellished the pail. Great job!!!
ReplyDelete