PLEASE VISIT MY NEW BLOG

Showing posts with label mod podge. Show all posts

Wednesday, December 5, 2012

Display Your Menorah Candles in Style

Hanukkah Crafts
You might think Chanukah is early this year.  However, it's right on time, like it is every year!  According to the Jewish Calendar, Chanukah is always the 25th day of Kislev, which this year coincides with this coming Saturday, December 8th. 
 
It seems to change every year because the Jewish Calendar takes into account both the cycles of the moon and the sun.  To make up the difference between the solar year, which is 365 days, and the lunar year, which is 354 days, the Jewish Calendar adds one extra "leap month" about 7 times every 19 years.  I agree--that's a lot of math to calculate.  Since it's been awhile since my algebra class, let's just move on to the craft project!
 
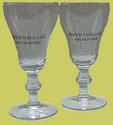
It's always wonderful to polish the beautiful silver menorah and dust off the colorful ceramic Chanukiot.  However, have you ever thought how drab the store-bought box of candles looks sitting next to the beautiful menorahs?  
 
Here is a crafty way to display your menorah candles in style. 
holiday crafts with candles 
Pin It
In addition to a box of Chanukah candles, you will need the following supplies:
 
- Libbey 4" x 4" square glass votive holder
- Scrapbook Paper or Gift Wrap
- Ribbon
- Flowers
- Buttons
- Dreidel or Menorah Charm
- Tag punch or ready-made tags
- Chanukah stamps
- Ink Pad
- Mod Podge & brush
- Strong double-sided adhesive tape

Crafts for Hanukkah
Instructions:

Make a template measuring 1-1/2" wide x 13-1/2" long, creating a slight arch. The paper band must arch to accommodate the width difference between the top and bottom circumference of the glass. Wrap the template around the glass to be sure it fits, overlapping the ends. 
Trace the template onto a 12" x 12" scrapbook paper, angling the template to fit the paper and cut out along your traced markings. To save paper, you can cut two sections and piece them together, adding an extra 1/2" for overlap.

Mod Podge the paper band and let dry. Using good adhesive, adhere band to the glass, gently pulling it taut, and overlap the ends. 
Embellish the candle holder using ribbon, flowers, charms, die cuts and stamped images on punched out tags.

Place the candles inside the glass holder, and you have a beautiful way to display the menorah candles throughout the eight nights.
 
These make wonderful hostess gifts. Wrap the entire candle holder with clear cellophane. Tie with ribbon and a matching tag, and it's ready to go!
hanukkah crafts
Pin It
And for those of you who like to plan ahead of time, next year we will be eating latkes for Thanksgiving, as the 25th of Kislev falls the day before Turkey Day.  Oy!
Menorahs
For those of you celebrating Chanukah, wishing you and your family a very Happy Chanukah full of beautiful light and miracles!


Sharing this holiday project at these parties:

Winter Wonders & Holiday Happenings


Twigg Studios
Two Yellow Birds
From my Porch to Yours
SNAP!
Jann Olson
Yesterday on Tuesday
Katherine's Corner
House of Hepworth's
Night Owl Crafting
Mine for the Making
Beyond the Picket Fence
Bloom Designs
One Artsy Mama
Answer is Chocolate
My Repurposed Life
Life as We Know It by Paula
504 Main
The Thriftiness Miss
Craftionary
Serenity Now
I Gotta Create
Crafty Scrappy Happy
Alderberry Hill
Doodles & Stitches
Shaken Together
clean and scentsible
This Gal Cooks
The Chicken Chick
Cupcakes & Crinoline
Three Mango Seeds
It's so Very Cheri
Setting for Four
barns and noodles


Saturday, August 18, 2012

Crafting with a View of the Pacific Ocean Blue

Ahhhh--vacation!  We work so diligently immediately before and right after
a getaway, but it's all worth it for the change of scenery, relaxation and...
uninterrupted craft time! 

We spent one glorious week, with family friends, enjoying Laguna Beach. 
If you've been there, you know how beautiful the Pacific Ocean water 
shimmers under the bright hot sun. 
We hoped for some nice, cool ocean breezes,
given the relentless heatwave Southern California has been experiencing.
It was a "mild" 90', which was, at least, cooler than the 108' at home.

We enjoyed early morning walks at low tide,


beautiful views while sipping on a chocolate banana shake
overlooking Crystal Cove,
The Shake Shack
simmering sunsets

and crafting with friends!  
That's right. No vacation is complete without a trunk full of craft supplies.
Hey, if he gets to bring his boogie board, I get to bring my crafts.
One day, we moms got together on the large patio.
We altered shadowbox photo frames with, of course,  
a BEACH theme!


It was so much fun sharing my crafting obsession with the girls. 
Here's my finished shadowbox frame:
Scrapbook Ideas
 
Beach theme projects
Pin It
I love how the contrasting sepia photo with the brightly-colored photo frame
and the coordinating banner tucked underneath the glass.

Additionally, my husband encouraged me to take a collage class
with a well-known Laguna artist. 
She taught us technique, color and composition.
Here is my first-ever genuine collage:
Venice inspired artPin It
It was a fun week.  Of course, the days flew by.
We're already looking forward to next year's beach vacation.
 
You may like this summer project:
Summertime art projects

Sharing posts here:


Wednesday, June 20, 2012

Irish Coffees at the BV

Nothing beats a cold, foggy day in San Francisco than a warm Irish Coffee at The Buena Vista.  Except maybe two Irish Coffees!  Just a week ago, we sauntered into our favorite local establishment and imbibed in a couple of these delicious liquid refreshments.  The fact that it wasn't cold or foggy isn't really important!  [It was actually close to 80 degrees that day.]  However, we didn't miss our chance to dine at The BV anyway.  After all, it's been a San Francisco icon since 1889.


Back in Southern California [tell me again why we ever moved?], it was time to think about a gift for Father's Day.  I immediately remembered the two napkins I [accidentally on purpose] took with me that day.  The napkins detail a beautiful line drawing of The Buena Vista.  How can I incorporate these into a gift for my husband? 

Although I'm a master at decoupage, I had never used napkins in any of my projects--until now. 

I gathered all my supplies:  the napkins (obviously), 4" ceramic tiles, paper cutter, sharp scissors, off-white cardstock, corner rounder, liquid chalk, Mod Podge and a brush, and a pint of my favorite Irish Whiskey [this item is optional].


Since the napkin was so thin, I decided to first decoupage plain cardstock onto the tile.  I cut two 3-3/4" squares, rounded the corners and edged them with brown chalk.  Then decoupaged the cardstock to the tiles.

I cut out the illustration with sharp scissors, keeping the napkin folded.  It was easier to get a precise cut using the four napkin layers.  Then I CAREFULLY decoupaged the just the top layer of the napkin to the front of the cardstock tile. 

It was a little tricky to lay down the thin napkin, but if you work gently and quickly, you get a great result. Three more coats of decoupage and felt rounds to the back finished the project.

 Pin It

I think they look pretty legit.  Wonder if the BV wants to sell them in their gift shop right next to their personalized Irish Coffee mugs?


The gift was a big hit. 
Happy Father's Day, dear!

[This is an unsolicited post and only reflects the opinion of this writer.]

Friday, June 1, 2012

Coffee Notes [Altered Chalkboard]

                          chalkboard projects

You can never have too much of a good thing.  Like good friends.  Good coffee.  And a good place for notes.  Combine these three, and you get a Coffee Notes Chalkboard! 
While casually strolling the clearance bins at "T" last week, I spotted large chalkboards at 70% off the regular price of $2.50.  A quick calculation told me that is only 75 cents each!  At that price, I quickly pounced on picked up the seven that were left in the bin, and raced made my way to the checkout line.
Since I wasn't planning to use this as a scoreboard, I gathered crafting goodness from my stash with a coffee theme including chipboard letters, stickers, scrapbook paper, ribbon, ric rac, buttons and twine.

With Mod Podge [don't leave home without it], I adhered paper and ribbon to the top of the chalkboard and added two coffee stickers to the board as well.

Since this is, after all, a chalkboard, I needed a place to hold chalk.  This mint tin container was the perfect size.

I Mod Podged the tin container with paper, ribbon and ric rac. Typed out the word "chalk" using my handy label maker [which I've owned since the 3rd grade].  Using the chipboard, spelled out "notes" and, just for fun, placed the "s" onto the altered tin container.  Using adhesive squares, I adhered the container to the chalkboard.  And, of course, included a few pieces of chalk.
I tied twine around the chalkboard, finishing it into a bow, and added two buttons (a coffee pot and a cup) to complete the altered project.
coffee notes
So, where do "good friends" come into this project? 

Pin It
[Good] friends don't let friends drink decaf!

Thursday, April 5, 2012

Passover Planter Placecards

This weekend brings many families and friends together.  My family celebrates Passover, where we retell the story of the Exodus with blessings, songs and specially-prepared foods.  When we were kids, my parents invited many friends and relatives to join us for the seder.  Because we had about 30 people, we moved our living room furniture into the dining room, and turned our living room into a large dining hall.  We also used place cards to assign everyone a seat.  That was always my responsibility...which I took very seriously. 

This year, I decided to rekindle my job and make place markers using small terra cotta pots.  You can see from this photo with the ruler, the biggest pot only measures 4" tall. 

I painted the three pots in different combinations of blue and white paint, and added pictures and text that I printed out on clear sticker paper.  After coating each pot with modge podge, I wrapped blue and white baker's twine around two of the pots. 

Use terra cotta planters for spring centerpiece

Herb Plants for PassoverPin It

I printed names on white cardstock, then mod podged the cards onto wooden plant markers painted blue. 

 
A green herb (such as parsley or cilantro) is used on the Passover table to symbolize spring.  So I decided to plant herbs in each pot.

Pin It

I'm going to use the largest pot as a centerpiece, so I made a label that reads "Kosher for Passover". 


I decided the smallest pot was just too tiny to hold a plant, so I used the medium sized pots for the place markers.  These festive pots and plant markers should add a nice touch to my parents' seder table. 

Whatever you celebrate this weekend, have a wonderful time with family and friends. 


May be sharing here:
and

Glitter, Glue & Paint
Related Posts Plugin for WordPress, Blogger...