PLEASE VISIT MY NEW BLOG

Showing posts with label 2012. Show all posts

Saturday, August 18, 2012

Crafting with a View of the Pacific Ocean Blue

Ahhhh--vacation!  We work so diligently immediately before and right after
a getaway, but it's all worth it for the change of scenery, relaxation and...
uninterrupted craft time! 

We spent one glorious week, with family friends, enjoying Laguna Beach. 
If you've been there, you know how beautiful the Pacific Ocean water 
shimmers under the bright hot sun. 
We hoped for some nice, cool ocean breezes,
given the relentless heatwave Southern California has been experiencing.
It was a "mild" 90', which was, at least, cooler than the 108' at home.

We enjoyed early morning walks at low tide,


beautiful views while sipping on a chocolate banana shake
overlooking Crystal Cove,
The Shake Shack
simmering sunsets

and crafting with friends!  
That's right. No vacation is complete without a trunk full of craft supplies.
Hey, if he gets to bring his boogie board, I get to bring my crafts.
One day, we moms got together on the large patio.
We altered shadowbox photo frames with, of course,  
a BEACH theme!


It was so much fun sharing my crafting obsession with the girls. 
Here's my finished shadowbox frame:
Scrapbook Ideas
 
Beach theme projects
Pin It
I love how the contrasting sepia photo with the brightly-colored photo frame
and the coordinating banner tucked underneath the glass.

Additionally, my husband encouraged me to take a collage class
with a well-known Laguna artist. 
She taught us technique, color and composition.
Here is my first-ever genuine collage:
Venice inspired artPin It
It was a fun week.  Of course, the days flew by.
We're already looking forward to next year's beach vacation.
 
You may like this summer project:
Summertime art projects

Sharing posts here:


Wednesday, February 29, 2012

Terra Cotta times Three

One of my very favorite crafty garden projects is the tiered terra cotta planter. 

I first saw this idea on Amy's creative blog, Positively Splendid, back in May 2010; and I finally got around to creating my own tiered planter and checking this off my "wanna-make" list! [Applause]


You'll have to excuse the lack of "before" photos or tutorial.  I was too excited about finally making the tiered planter to slow down and take photos of the mundane terra cotta pots or the creative process.  However, you can link to Amy's post to get all the how-to's.  In the meantime, just relax and enjoy the photos:

Poolside
How did Coconut sneak into the pic?
That's better

Ultimately, it found its rightful place on the front porch. 
Here it is with the flowers grown up a bit.


Extra flowers found their way into an oversized garden cup
This fountain was not handmade, but it was a double mark down
 clearance buy that we attached to the opposite brick wall.

By Southern California standards, we're having a really cold winter. 
Which is why I especially like the bright colors I used.
Pin It

It's a sure sign that spring is on its way.


Having a great time partying with my friends:
Get Your DIY On [House of Hoff]
OUR NEXT LINK PARTY!!


A Bowl Full of Lemons
Cozy Little House
A Little Knack Knack
Five Days Five Ways
Sidewalk Shoes Garden Tuesday
Blackberry Vine
Craft-o-maniac
The Sweet Talk
Skip to my Lou
Alderberry Hill
Flamingo Toes Think Pink Sunday
Under the Table and Dreaming
Creative Jewish Mom)
Nifty Thrifty Things
You are Talking Too Much Meet Me Monday 
1929 Charmer
504 Main
Classy Clutter
Family Ever After
The Answer is Chocolate
From My Front Porch to Yours
Suzy's Sitcom
Serenity Now
Lil Luna
Get Outta My Head
Oopsey Daisy Wednesday's Wowzers
Passionately Artistic
Ginger Snap Crafts
Sugar and Dots
Someday Crafts
Cow Girl Up-link Party
The 36th Avenue
Night Owl Crafting
The Shady Porch
Blue Cricket Design
Handy Man Crafty Woman
Today's Creative Blog
Jillify It
Just a Little Creativity
The D.I.Y. Dreamer
Happy Hour Projects
katherine's corner
Fireflies and Jellybeans
House of Hepworths
A Glimpse Inside

Friday, January 6, 2012

Welcome 2012: Enter at Your Own Risk

Happy New Year!  Hope you had a wonderful and creative holiday season. 

Have you packed up all the holiday decorations yet?  We did.  It's always so nice to bring them out from the garage every year.  Then it's a chore great putting them away. 

Our home always looks so clean afterwards with just one exception:  my craft cave.  [I call it a cave because it is slightly larger than our master bathroom.]  It is currently a dangerous "Enter at Your Own Risk" space with craft supplies everywhere except where they should be: spread out on the floor, piled high upon the chair, and strewn across my desk.  Everything needs to be organized.  Ugh!  All I want to do is create new altered art projects.  However, I cannot even walk into the room without tripping on a cutting board and hundreds of ribbon spools.


So in the spirit of recycling, and in avoidance of the inevitable purging and organizing that awaits, I offer you my first post from last year as the first post of this year!   However, I've left out the rhetoric.  I'm not going to even pretend that I achieved all my goals.  That's what January is all about. It's the start of a new year. Everyone gets a clean slate to tackle the old and bring in the new resolutions, goals, aspirations and ideas.

So good luck to me, and good luck to you!  Ready, Set, Go! 
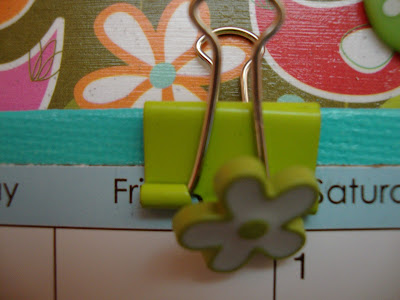
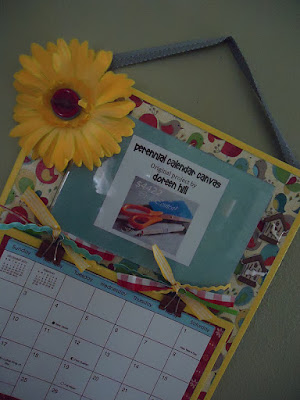
Calendar & Photo Canvas

Material List:
  • 9" x 12" and 6 x 8" canvas panels
  • coordinating scrapbook paper cut 8-1/2" x 11-1/2" and 5-1/2" x 7-1/2"
  • acrylic paint & foam brushes
  • Acrylic adhesive sealer
  • Binder clips
  • Buttons
  • Spiral paper clip
  • Hemp cord
  • calendar, cut to fit smaller canvas (I found these for 50 cents at Michael's)
  • metal label holder & brads
  • 4" x 6" acrylic flat photo frame
  • photo (which is interchangeable)
  • double-sided foam tape
  • assorted ribbon, ric-rac
  • silk flower (cut from stem and backing)
  • number stickers
  • hot glue gun


If you like the bright color combination used for this calendar canvas, click here to see the matching mail & note holder I made last year.  Also, I have a written tutorial available.  If you would like a copy, just leave me a comment with your email address :) 

And here's another calendar canvas created with a different color scheme:


Editor's Note:  I plan to clean up the craft cave this weekend, and create something new, and post it next month sometime week.  Also, for those of you keeping count, I admit to only posting four Chanukah projects in my Eight Projects of Chanukah series.  [sigh]
Doreen

Attending these wonderful parties:  Oopsey Daisy, The Answer is Chocolate, 504 Main,
Related Posts Plugin for WordPress, Blogger...