PLEASE VISIT MY NEW BLOG

Showing posts with label stencils. Show all posts

Thursday, July 7, 2016

Kitchen Towel Rack Makeover


This is one of my favorite home decor makeovers. 


Hard to believe it started like this.


Click on over to my new blog at Wordpress to see all the photos plus info on finding the beautiful stencil I used for this project.

Click here: Altered Artworks


Wednesday, March 4, 2015

Nightstand Transformation from Blah to Beauty-ful


ASCP
Gotta love how paint can completely transform an outdated furniture piece.  

I picked up this little eyesore--err, I mean potential beauty--for $15 at the local flea market a few months ago.  Even with St. Patrick's Day coming up, its shade of kelly green did nothing for our home decor.   

 So, out came the ASCP (Annie Sloan Chalk Paint) in French Linen and Old White.
Updated furniture
There is a great deal of discussion on whether ASCP is worth the high price.  I've been experimenting with a few colors of the expensive paint.  It really does cover well.  You only need 1 - 2 coats.  I can't say I'm hooked, but I do enjoy its consistency and ease of use.  Some days, it beats making my own chalk paint.

I tried my hand at stenciling this time by adding a decorative design to the top of the nightstand.
[so fancy!]
How to stencil designs on furniture


And a little stamping on the bottom drawer.
nightstand tranformation
As well as a decorative paper liner inside the drawer.

 I finished the nightstand with a little distressing around the edges.  


 This transformed beauty landed in my daughter's room, replacing an old boring bookcase.


Friday, July 26, 2013

Glittery Beach Party Favors

[This is a sponsored post written by me for #Plaid Kids Crafts and Blueprint Social.  I was not compensated, but did receive free products, for writing this post. All opinions are 100% mine.]
 
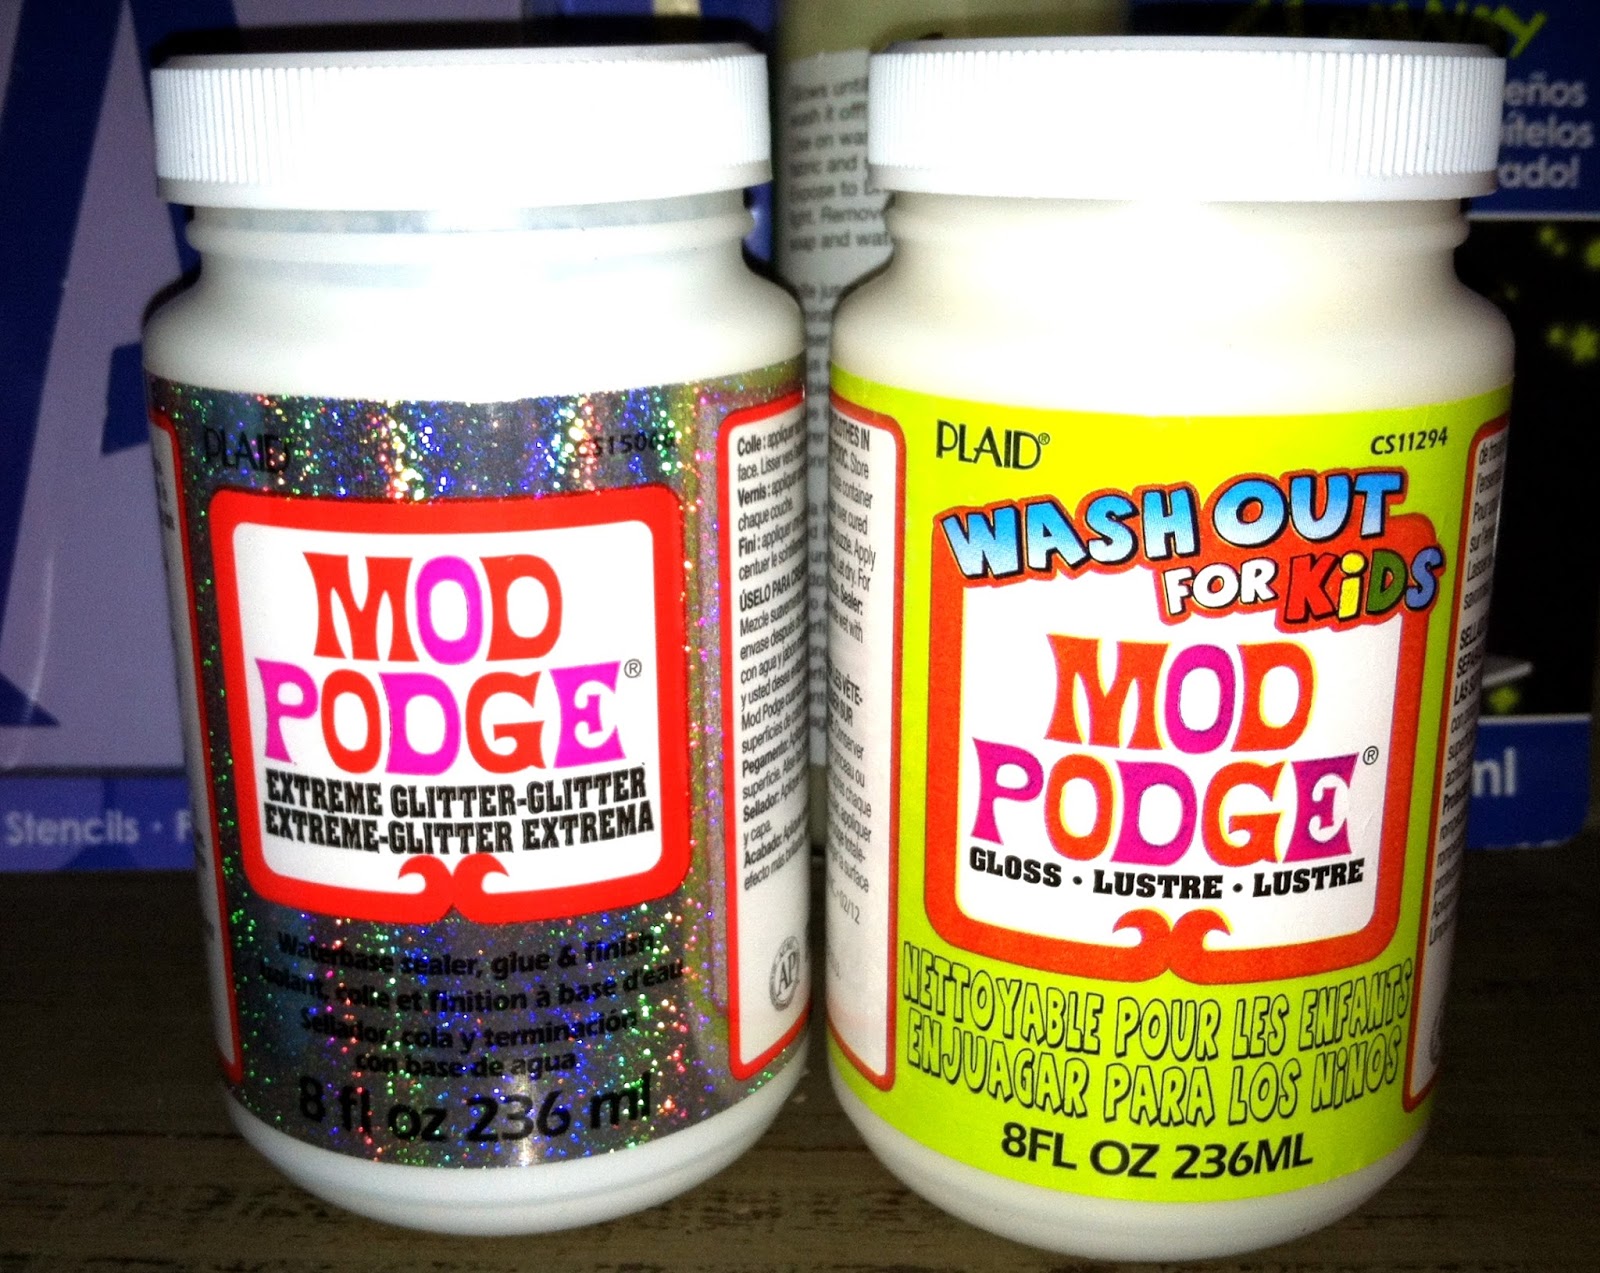
They say that life's a beach.  Here on the west coast, the Pacific Ocean offers us miles and miles of beautiful sandy shores, spectacular surf, breathtaking vistas, and of course, sensational sunsets.  So the beach is the perfect place to throw a summer party for kids.  And, of course, this means beachy party favors.  As part of the Plaid Kids Crafts Summer Campaign, I received a box full of awesome craft supplies:  Apple Barrel bright, neon and glow-in-the-dark acrylic paints, Mod Podge Extreme Glitter, Wash-Out for Kids Mod Podge, Glo-Away Gel, and alphabet stencils. 


I thought these fun, summery craft products would be perfect to create glittery beach pails.  Since these products are fun and safe for kids of all ages to use, each child at the party could decorate their own beach pail. 

For this project, you will need:

Apple Barrel Acrylic Paints
[I used Bimini Blue, Yellow Glow in the Dark & Glow in the Dark Fluorescent Pink]
Extreme Glitter Mod Podge
Plaid Stencils
Foam brushes
Painter's Tape
A tin pail with handle
Large tags
[Optional: washi tape, buttons & twine]

1.  Tape off sections of the pail and paint stripes. 

Two coats of the paint nicely covered the pail. While still wet, remove painters tape. 
 
2.  Choose a stencil, and tape it to the side of the pail.  In the alphabet stencil sets, I was pleasantly surprised to find shapes and numbers, too.  I went with the flower.
 
Using a pouncing motion, paint inside the stencil.  Move the stencil around the pail to create additional flowers.  Allow paint to dry.


3.  Add Mod Podge Extreme Glitter. 
I admit, I've never been much of a glittery kinda gal.  However, after using Mod Podge Extreme Glitter, I am hooked. I brushed it onto the blue stripe, the yellow stripe, and the flowers!  If my dog would've sat still, I may have even brushed a little glitter on him, too!  While the Mod Podge was still wet, I added ric-rac to trim the top rim.  For a little added flair, I glued some cute buttons to the center of the flowers.  [I used a hot glue gun for this step.]

4.  Embellish a personalized tag. 
 
I embellished the tag with pink & black dotted washi tape.  Grabbing the stencils again, I painted and glittered a number and a flower.  This time, I used the punched-out portion of the stencil.  Using the Mod Podge as an adhesive (yes, it's an adhesive, too!), I added the No. 1 and the flower to the tag. 

5.  Paint the pail handle and add Washi tape to coordinate with the tag.

Pin It
 
These pails are perfect for a beach scavenger hunt. See who can collect the largest seashell, the smallest rock, a piece of seaweed, and whatever else one might find at the beach. Get your camera ready because the glitter will sparkle and the bright colors will pop when hit by the sun!  And, of course, those kids are going to look adorbs!
 
That's it! 
Let the snipe hunt beach party begin.
 
The Well Crafted Home
 
Sharing ideas at some of these parties!
 
For additional creative project ideas using these and other Plaid products, visit
 

To see even more bright ideas using Plaid Kids Crafts:


Wednesday, March 20, 2013

Grow Your Own Placecards using Clay Pots & Herbs


The next two weeks bring many families and friends together. Not only are many families celebrating the joys of spring break (well, at least the kids are celebrating!), many are busy preparing for the week-long festival of Passover.  This is where we retell the story of the Exodus by reading the Haggadah, singing songs and eating specially-prepared foods.

When we were growing up, my parents invited friends and relatives to join us for our Seder. Because we had 25-30 people joining us, we moved our living room furniture into the dining room, and turned our living room into a large dining hall. With so many people, we created place cards to assign everyone a particular seat.  Making the place cards was always my responsibility...which I took very seriously.  

Last year, I re-instated my job and made place "cards" using small Terra cotta pots.  These are so much fun to create, and kids can get in on the creative action.  I decided to share this idea on my blog again this year, with a few minor revisions.

Materials:
Small clay pots in various sizes, no larger than 4"
Clay saucers

Blue & white acrylic paint
Mod Podge
Brushes
Clear sticker paper or Xyron sticker maker
Passover Graphics & Text
Twine
Wooden plant markers
Herbs (such as parsley)

This is the How-To:
I painted the pots in different combinations of blue and white paint.  While they dried, I printed graphics and text onto clear sticker paper.
Kosher for Passover logos


Next Year in Jerusalem


Then I adhered the stickers to the pots.  After coating each pot with Modge Podge, I wrapped blue and white baker's twine around two of the pots.

Passover centerpieces

Passover crafts
Pin It

I printed names on white cardstock, cut them out and mod podged the cards onto wooden plant markers, which I had painted blue.   


A green herb (such as parsley or cilantro) is used on the Passover table to symbolize spring. So I decided to plant herbs in each pot.
Pin It
I'm going to use the largest pot as a centerpiece, so I made a label that reads "Kosher for Passover." 

The smallest pot was just too tiny to hold a plant, so I used the medium sized pots for the place "cards."
Herb planters for holiday centerpieces

These festive pots and plant markers will add a nice touch to any Seder table.  The larger pot will also make a great hostess gift!  And, of course, depending on the colors and signage you use, these pots can easily be made for any holiday or occasion! 

Whether you celebrate Passover, Easter or even just Spring Break, I hope you have a wonderful time with your family and friends. 
Happy Spring!
You may also like:
patio garden decor
Springtime Tiered Planter


Related Posts Plugin for WordPress, Blogger...