PLEASE VISIT MY NEW BLOG

Showing posts with label handmade gifts. Show all posts

Wednesday, December 3, 2014

Festive Handmade Holiday Gifts

It's finally raining here in Southern California.  The heavy mist almost looks like snow!  It's as close to a white flurry as we get.   Time to fire up the logs in the fireplace, stay in our pajamas all day, sip hot cocoa, and...craft! 

Handmade holiday gifts are the best, especially those that are quick to make, inexpensive and say "Happy Holidays" in a special way. They are great for teachers, neighbors and other special people.

Today I'm going to show you how to embellish clear acrylic pails and turn them into festive holiday gifts for both Christmas and Chanukah (Hanukkah).  They can easily be adapted to any other holiday as well.

Supplies: 

Clear acrylic pails  [I found 4-1/2" pails in different colors] 
Small 2" acrylic pails 
Shredded, crinkly paper
Crafting embellishments
Holiday Treats [to fill the pails]


Christmas Pail Fillers:   Assorted holiday candies, coffee, gift card, candles and playing cards.


Embellishments:  Choose ribbons, stickers, buttons, tags, and a rubber stamp with a holiday greeting.

The How-To:  Embellish the outside of a large pail.  I adhered beaded ribbon around the top of the pail.   Line the bottom inside of the pail with shredded paper.

Stamp a festive greeting onto a tag and tie to pail with ribbons.
 
  
Cover lid with pretty paper and rhinestones. 

I recommend decoupaging the paper to the lid to resist tearing.

Add the Christmas items to the large pails.  Fill smaller pails with candies such as m&m's or jelly bellies.  You can find holiday assortments or mix and match several bags of solid m&m's.

Here is what you'll need to make the Chanukah gift pail:

Fillers:  Chocolate gelt, dreidels, candles and matches.

The How-To:  Stamp a festive greeting onto a tag and tie to pail with ribbons.

Adhere ribbon around the outside of the pail.  For this one, I used two different ribbons, one at the top and one at the bottom.  Add shredded paper to inside bottom of pail; top lid with pretty paper or a sparkly bow.

Add contents to pail.

These pails are so versatile.  They make great table favors.  You can dress them up for many occasions including New Year's, the Super Bowl, Birthdays and Anniversaries.  You're just limited by your imagination and occasion!  
Handmade Holiday Treats

You may be able to find me sharing these ideas here 
as well as these new link parties:


Tuesday, December 2, 2014

Hanukkah, Oh Chanukah

Any which way you spell it, the Festival of Lights will be here before you know it.  This year, Chanukah begins Tuesday evening, December 16.  It's just two weeks away, but you have plenty of time to create unique Chanukah decor and gifts.

Handmade Hanukkah Gifts

One of my favorite projects is this "Chanukah-in-a-Jar."  There are many variations of recipes in a jar for delicious cookies, soups, natural scrubs, and more.  In fact, I've even altered tennis ball cans for brownies-in-a-tennis-ball-can recipes. 

For this project, I use a clear plastic pail that is 6" tall with a 4" diameter.  It has a lid as well as a handle, which lends itself nicely for attaching ribbons and tags.


Start by gathering craft supplies to embellish the container.  Include printed and solid scrapbook or gift wrapping paper, ribbon, punches, stamps, ink, tags, charms, metal labels, etc.
 

Chanukah decor


At this point, embellish the pail.  This is what I did.  Cut a strip of cardstock 2" x 18".  If using a 12" x 12" piece of paper, you will have to cut two pieces and tape them together.  Then cut a coordinating piece of your printed or gift wrap paper  to 1-1/2" x 18"  Using a dry adhesive, tape these two long pieces together.  Adhere ribbon to center of strip.

Using a 2-1/2" circle punch, cut a circle with glitter paper.  Punch out two smaller circles (I used a scalloped punch, too) from the solid cardstock.  Stamp image on smaller circle.

Adhere long strips to pail.  Then adhere the circles to the pail, covering up the seams.  (This then becomes the front of the pail.)
Chanukah crafts

Using varied textures and widths, cut 6" strands of coordinating ribbon to pail handle.  Cover the inset of the lid with paper using decoupage sealer.  When dry, adhere label printed on cardstock and metal label holder to lid.  Tie charm to metal holder.
Hanukkah-in-a-Jar craft

Stamp "Happy Hanukkah" and "To/From" images to tags.

stamped holiday tags

You can find wooden dreidels at most party stores or in the Chanukah section of your local large discount store this time of year.  Decoupage top of the dreidel, using 1-1/4" square punch.  Punch a small hole in center of the paper square, which will fit over the dreidel stem.
playing dreidel

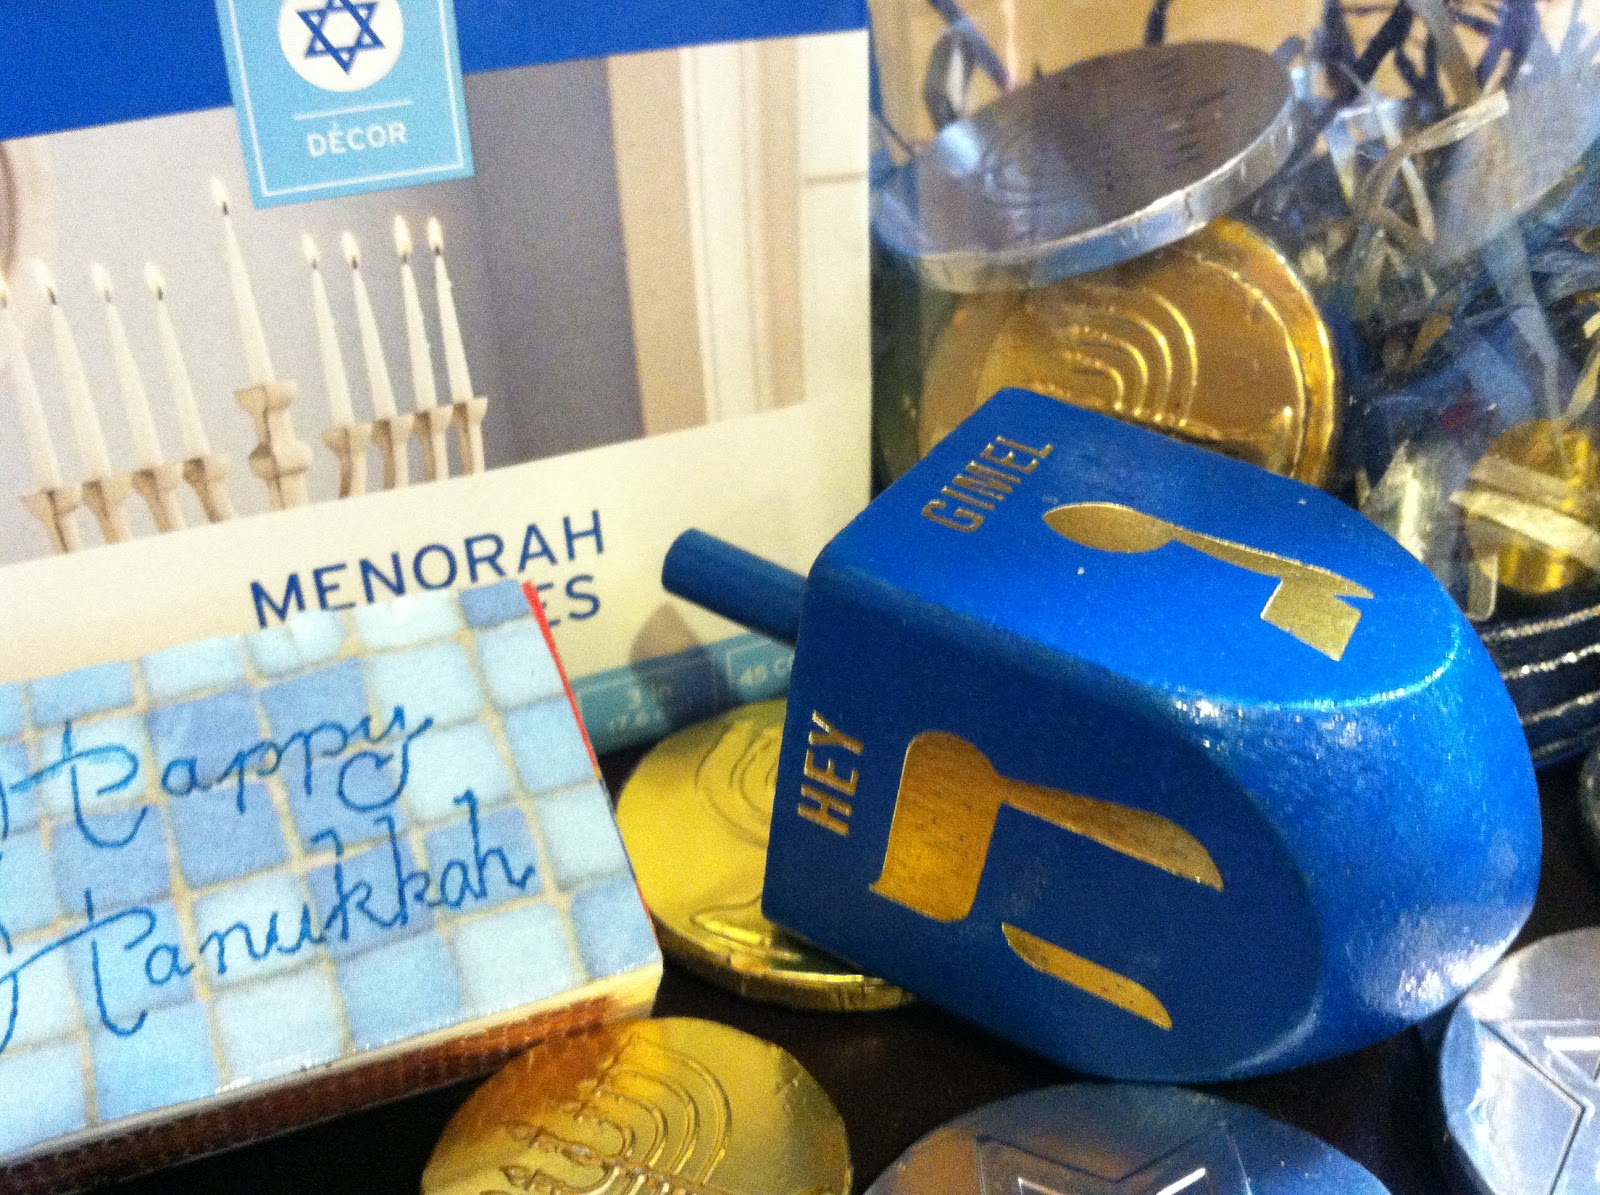
Then choose the "ingredients" for your jar.  I suggest an entire box of 44 menorah candles (enough candles for each night), the large dreidel, a small box of matches, chocolate gelt and candle blessings. 

For the blessings, I printed the Hebrew, transliteration and translation on both sides of a 4" x 6" cardstock, rolled it up and tied it with blue & white twine.
Chanukah gelt
 The match box is embellished with cardstock and a stamped image that reads "Happy Hanukkah".

Arrange the candles and other "ingredients" inside the pail. 

That's it!  Here is the completed Chanukah-in-a-Jar:
Handmade Hanukkah GiftPin It

If you would like a copy of the blessings document, leave a comment with your email, and I will be glad to send you a copy.

These Chanukah-in-a-Jar make great gifts for children, grandchildren, teachers and hostess gifts.

You may also like these holiday projects:
hanukkah crafts

Hanukkah coaster and tray decor

Linking up here
and


Friday, June 1, 2012

Coffee Notes [Altered Chalkboard]

                          chalkboard projects

You can never have too much of a good thing.  Like good friends.  Good coffee.  And a good place for notes.  Combine these three, and you get a Coffee Notes Chalkboard! 
While casually strolling the clearance bins at "T" last week, I spotted large chalkboards at 70% off the regular price of $2.50.  A quick calculation told me that is only 75 cents each!  At that price, I quickly pounced on picked up the seven that were left in the bin, and raced made my way to the checkout line.
Since I wasn't planning to use this as a scoreboard, I gathered crafting goodness from my stash with a coffee theme including chipboard letters, stickers, scrapbook paper, ribbon, ric rac, buttons and twine.

With Mod Podge [don't leave home without it], I adhered paper and ribbon to the top of the chalkboard and added two coffee stickers to the board as well.

Since this is, after all, a chalkboard, I needed a place to hold chalk.  This mint tin container was the perfect size.

I Mod Podged the tin container with paper, ribbon and ric rac. Typed out the word "chalk" using my handy label maker [which I've owned since the 3rd grade].  Using the chipboard, spelled out "notes" and, just for fun, placed the "s" onto the altered tin container.  Using adhesive squares, I adhered the container to the chalkboard.  And, of course, included a few pieces of chalk.
I tied twine around the chalkboard, finishing it into a bow, and added two buttons (a coffee pot and a cup) to complete the altered project.
coffee notes
So, where do "good friends" come into this project? 

Pin It
[Good] friends don't let friends drink decaf!

Saturday, February 4, 2012

You had Me at Hello.


The title says it all.  For anyone who's never seen the film, "Jerry Maguire," it is the best Valentine's movie EVER. The phrase, "You had me at hello" is one of the more iconic phrases in my vocabulary, and it is the creative catalyst for this altered art project.  And best of all, I used materials from my stash! 
I started with these somewhat "cugly" striped coasters 
which I immediately painted with black acrylic paint.  Bye stripes!

While the coasters dried, I cut out three squares of beautiful vintage
scrapbook paper to fit the coasters, and rounded the paper at the corners.
Next, I adhered the paper to the coasters with matte Mod Podge. 
I usually use a glossy finish for my projects; however, this matte finish
lends itself nicely to a vintage, romantic feel.
One more coat of MP on the top.
I edged the coasters with a bit more black paint, giving it a distressed look.
Then I dug deep into the dark corners of my craft closet in search of love--
love-themed embellishments, that is. 
I hit it big when I found a set of large white chipboard hearts. 
The chipboard has great texture, so I decided instead of covering them,
to stamp a French script design using black ink.  Voila! 
I continued embellishing the coasters with love-ly charms, acrylic flowers, baker's twine, chipboard, washi tape, acrylic tag, and a rub-on.   Then I typed up the wonderful phrase, adhered it to red chipboard and finished all three coasters off with additional Podge.

Then I contemplated how to display these coasters.  For those who know me, you are probably thinking well, of course, she is going to use a lot of ribbon.  That's what I thought.  However, I decided to return to the dark depths of my craft closet to see what other crafty treasures await. 

Lo and behold, I found a distressed green wooden frame. It was one of my Home Goods clearance finds I bought a few years ago for $3.50.
Only problem:  the signage.  It reads:

That will never do.  Unless this project is a gift for my dog.
How nice that Coconut already taped up the sides of the frame, so all I had to do was paint the inside of the frame in a warm antique white hue.

Then I adhered the coasters to the inside edges of the frame.


Pin It
I kinda like it. 
And I know Tom C my husband will like it, too. 
Happy Valentine's Day!

Having fun at these parties
A Delightsome Life
Love 2 Upcycle
valentine round up button

Two Little Birds Decor
Adorned from Above
Sugar Bee Crafts
Whipperberry
Mad in Crafts
Dear Lillie
Summit Street Joy
Lollipops Cards
Vintage Wanna Bee
Lil Luna
Blue Cricket Designs Show & Tell
It's Overflowing with Creativity
Passionately Artistic
Making the World Cuter
Today's Creative Blog
Polly want a Crafter
Cowgirl Iink up party at Ivy Cottage
A Bowl full of Lemons
At home with K
Serendipity and Spice
Homemaker on a Dime
Ginger Snap Crafts
The Girl Creative
Tator Tots and Jello
Craft-o-Maniac
Skip to my Lou
I should be Mopping the Floor
Under the table and dreaming
All Things Fee
Nifty Thrifty Sunday
I Heart Naptime
Flamingo Toes Pink Sunday
Serenity Now
The Answer is Chocolate
Positively Splendid
Young and Crafty,
Measured by the Heart


Related Posts Plugin for WordPress, Blogger...