PLEASE VISIT MY NEW BLOG

Thursday, June 20, 2013

Summertime Crafts


[Editor's Note:  For those of you who are reading this post in August, this is also a great idea for a back to school project!]

Yea, it's summertime!   For many kids, summer means camp fun.  Whether your children attend a sleepover camp, day camp, or even set up tents in your own backyard, it's always good to change up the routine and get into the summer groove.  Today I'm sharing an E-Z tutorial to alter a plastic pencil box into a surprise package. Fill it with camp "must haves," and sneak it into your child's duffel bag before he or she goes off to camp. 

Start with a plain plastic pencil box.  Staples usually carries these in their dollar bins.  Sometimes you can find them at dollar stores.  And they come in a variety of colors.
Mundane pencil box screaming for embellishments
Gather an assortment of colorful paper and coordinating ribbon, rub-ons, stickers, buttons, a metal label holder, and anything else you would like to use to embellish the box.
Ribbon, rub-ons, rhinestones, buttons, etc.
Measure the front of your box.  This box measures 7-3/4" x 2-7/8".  Cut two pieces of coordinating paper using your measurements.  Edge the paper with liquid chalk ink.  Punch a hole in one piece of your cut papers to make room for the snap closure.
A little edging to emphasize the border
Using a decoupage medium such as Mod Podge, coat the top of the box and the back side of the paper, and adhere paper to box. Smooth out any bubbles. When dry, apply a top coat to seal the paper.  This will keep the paper from tearing and provide a water-resistant surface.
I embellished one side of the box with a rub-on that reads, "Life's Better with Chocolate."
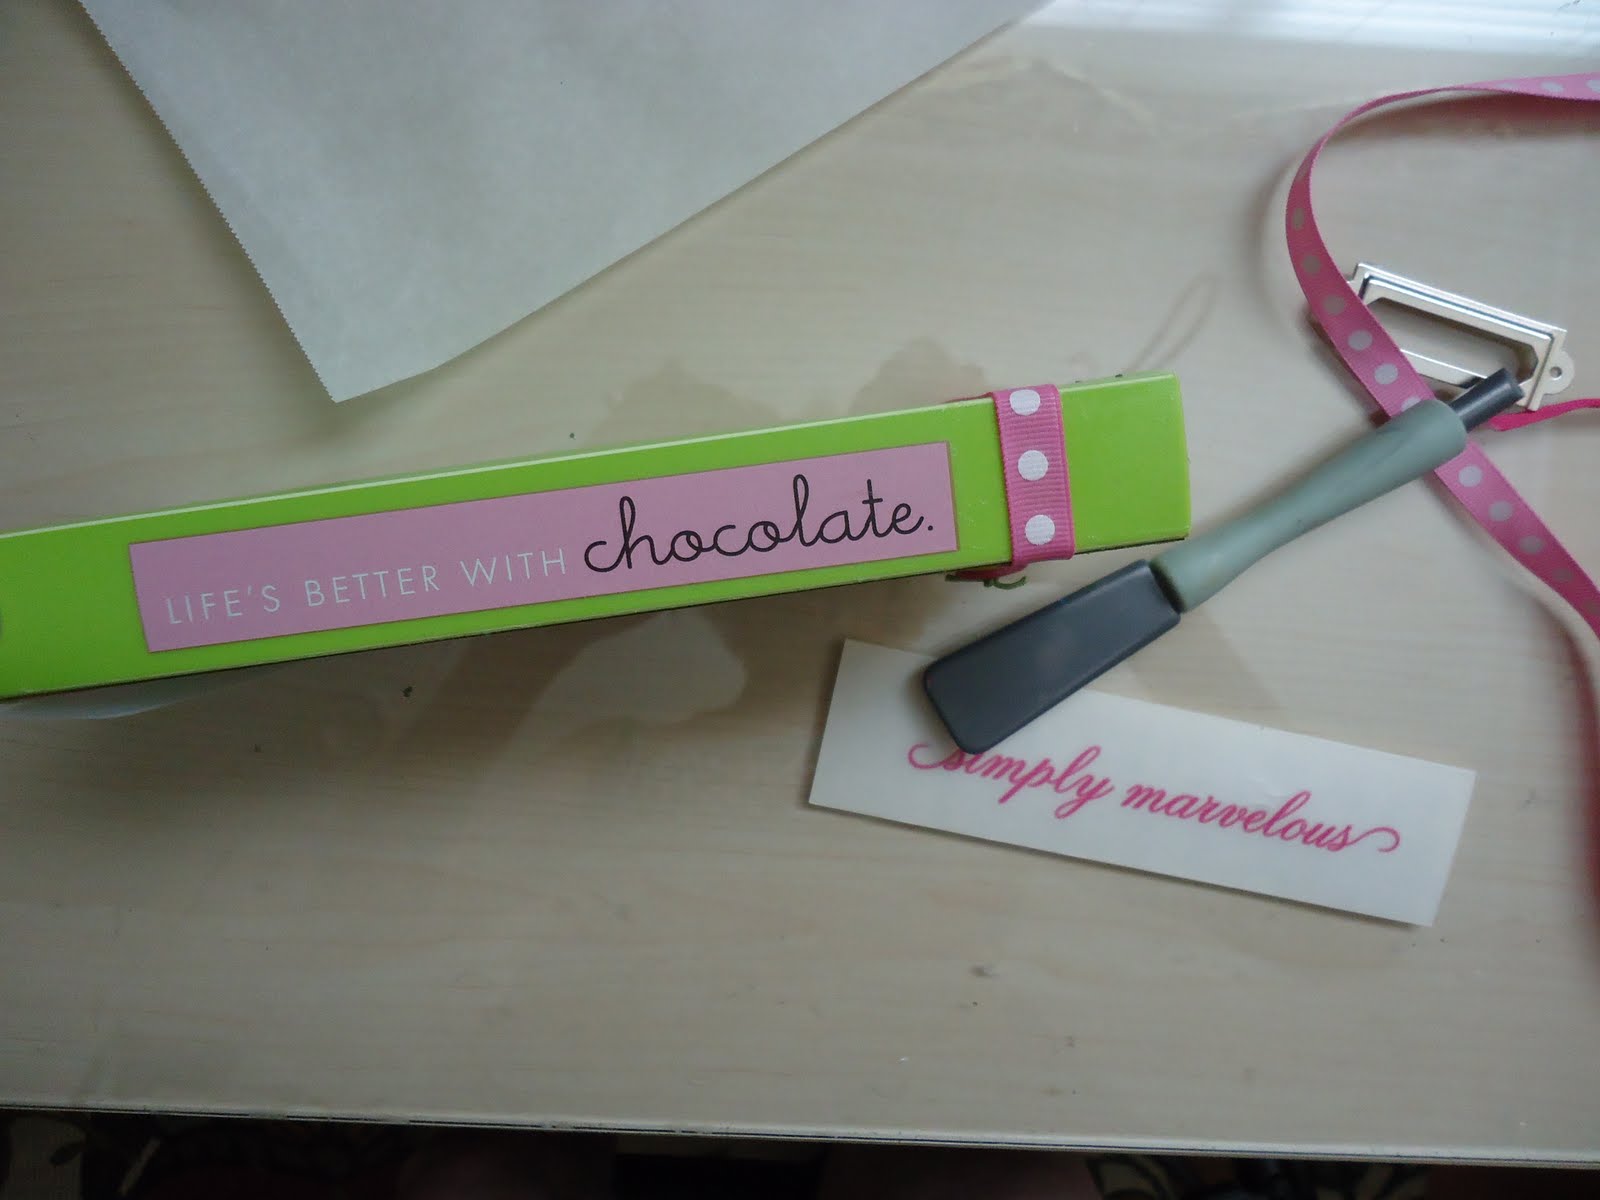
"Life's Better with Chocolate"
 Slide out the inside tray, and podge the coordinating piece of paper to it.
Mod Podge the interior
Now add embellishments to the front top of the pencil box. I added ribbon, buttons, and a metal label holder.  Then I personalized the box using my vintage Dymo label maker.   I also glued a flower button to the top of the snap closure.
School Organization
When completely dry, add your "ingredients."  Suggestions:  a pack of gum, band-aids, chap stick, mini suntan lotion, postage stamps, playing cards, and a mini note from home!  The note can be folded into a business card-sized envelope, which fits perfectly inside the box.

And I know I just said it was the beginning of summer.  However, this cute little box can easily be adapted for a back-to-school gift.  Add new pencils, pens, erasers, sharpener, and a 6" ruler for a great first day of school surprise.  Taking it one step further, I created a coordinating note holder (from a wooden clothespin) and a tile coaster to hold a water bottle in place. There's something about a coordinating ensemble that just oozes fun!    
project ideas for camp care packages

You may also enjoy these posts:

Beach theme projects

Summertime art projects


Sharing here and:
linkybutton22
Manic Mondays at Serendipity and Spice
Boogieboard Cottage
Practically Functional
Hookin Up with HOH

Tuesday, June 4, 2013

Fabulous Father's Day Photo Canvas

Collage Art

Daddy.  Papa.  Abba.  Pop.  Mr. Cool.
No matter what you call him, your father is always going to be the first man in your life.  The one who taught you how to ride a bicycle.  The one who always tells you how pretty you are.  The one you can count on.   My Dad celebrated his 90th birthday earlier this year and we had a big family get-together.  It was a special day.  I am so proud to be his favorite daughter.  Since I have two brothers and no sisters, I can say that with certainty. 

Our two daughters must share the role of favorite daughter with my husband.   And because he is such a wonderful Dad, we've created a fun photo canvas for him for Father's Day.   

We gathered together a plethora whole lot of supplies including coordinating paper, paint, chipboard letters, brads, twine, ribbon, corrugated cardboard, rub-ons, and a whole lot more.  And of course, a few of our favorite photos of Mr. [Mc]Dreamy. 


Then we had a snack. Have you ever noticed how well crafts and chocolate chip cookies go together?

The first step is to paint the sides and edges of your canvasses.  We used 9" x 12" and 4" x 12" canvas panels. 
 

Then cut the paper 1/2" smaller than the canvas panels.  Adhere the paper to the canvas using Mod Podge.  Cover entire surfaces with another coat of MP.  Let dry. 

We wanted to create a banner to back the chipboard letters, and decided to cut it out of corrugated cardboard for a more rugged look.   I drew triangles on the back of the cardboard to use as a pattern.

Make banners out of corrugated cardboard
I really like the way this banner turned out.


We thought it would be fun to add a few adjectives for "d-a-d" and came up with these words:
Dependable. 
Adventurous. 
[Mc]Dreamy.
Yeah, that about describes Mr. Wonderful.
We tied kraft tags to the letters with jute. 
Mixed Media art

Then we layed out, moved around, and re-positioned the photos and embellishments until we were blue in the face happy with the layout.  Before we changed our minds, we adhered everything in place.  To add some interest, we layered the photos onto coordinating paper, and adhered them with foam dots to pop them up a bit.

We found the greatest rub-on that reads, "Make Life an Adventure."  Perfect!  We adhered a mini canvas (5"x 3") to the large canvas, and added a strip of corrugated cardboard, buttons, a wooden heart, ribbon and a king's crown charm!


To tie the canvas panels together, we used small eye hooks.  I marked off 3" from either end, and twisted the eye hooks into the bottom side of the small [top] canvas and the top of the large [bottom] canvas. 


Then we looped twine and ribbon through the eye hooks, tying them tightly bringing the eye hooks close together.

 And here's a photo of the finished canvas.

Do you think he'll like it?  We hope so. 
Besides, how many ties does a Dad really need?

You may also enjoy these projects:


 I've been featured!
 
Ivy and Elephants
Dukes and Duchesses

Wednesdays @ 7pm CST:


Related Posts Plugin for WordPress, Blogger...